
Enable attendance
Turns on attendance tracking for this specific user, activating the live attendance card directly on their mobile dashboard.
Tired of relying on a biometric attendance machine that breaks down, needs constant maintenance, or raises hygiene concerns? NeyoDesk's built-in attendance tracking lets you manage both office staff and on-site technicians from a single mobile app - no extra hardware required.
4 practical steps · 5 min setup · Zero hardware requiredBefore enabling attendance for any user, go to Settings → Branches and edit your branch. You'll find latitude and longitude fields, plus a map pin icon that automatically grabs your exact location. Doing this from the mobile app gives the most accurate results.
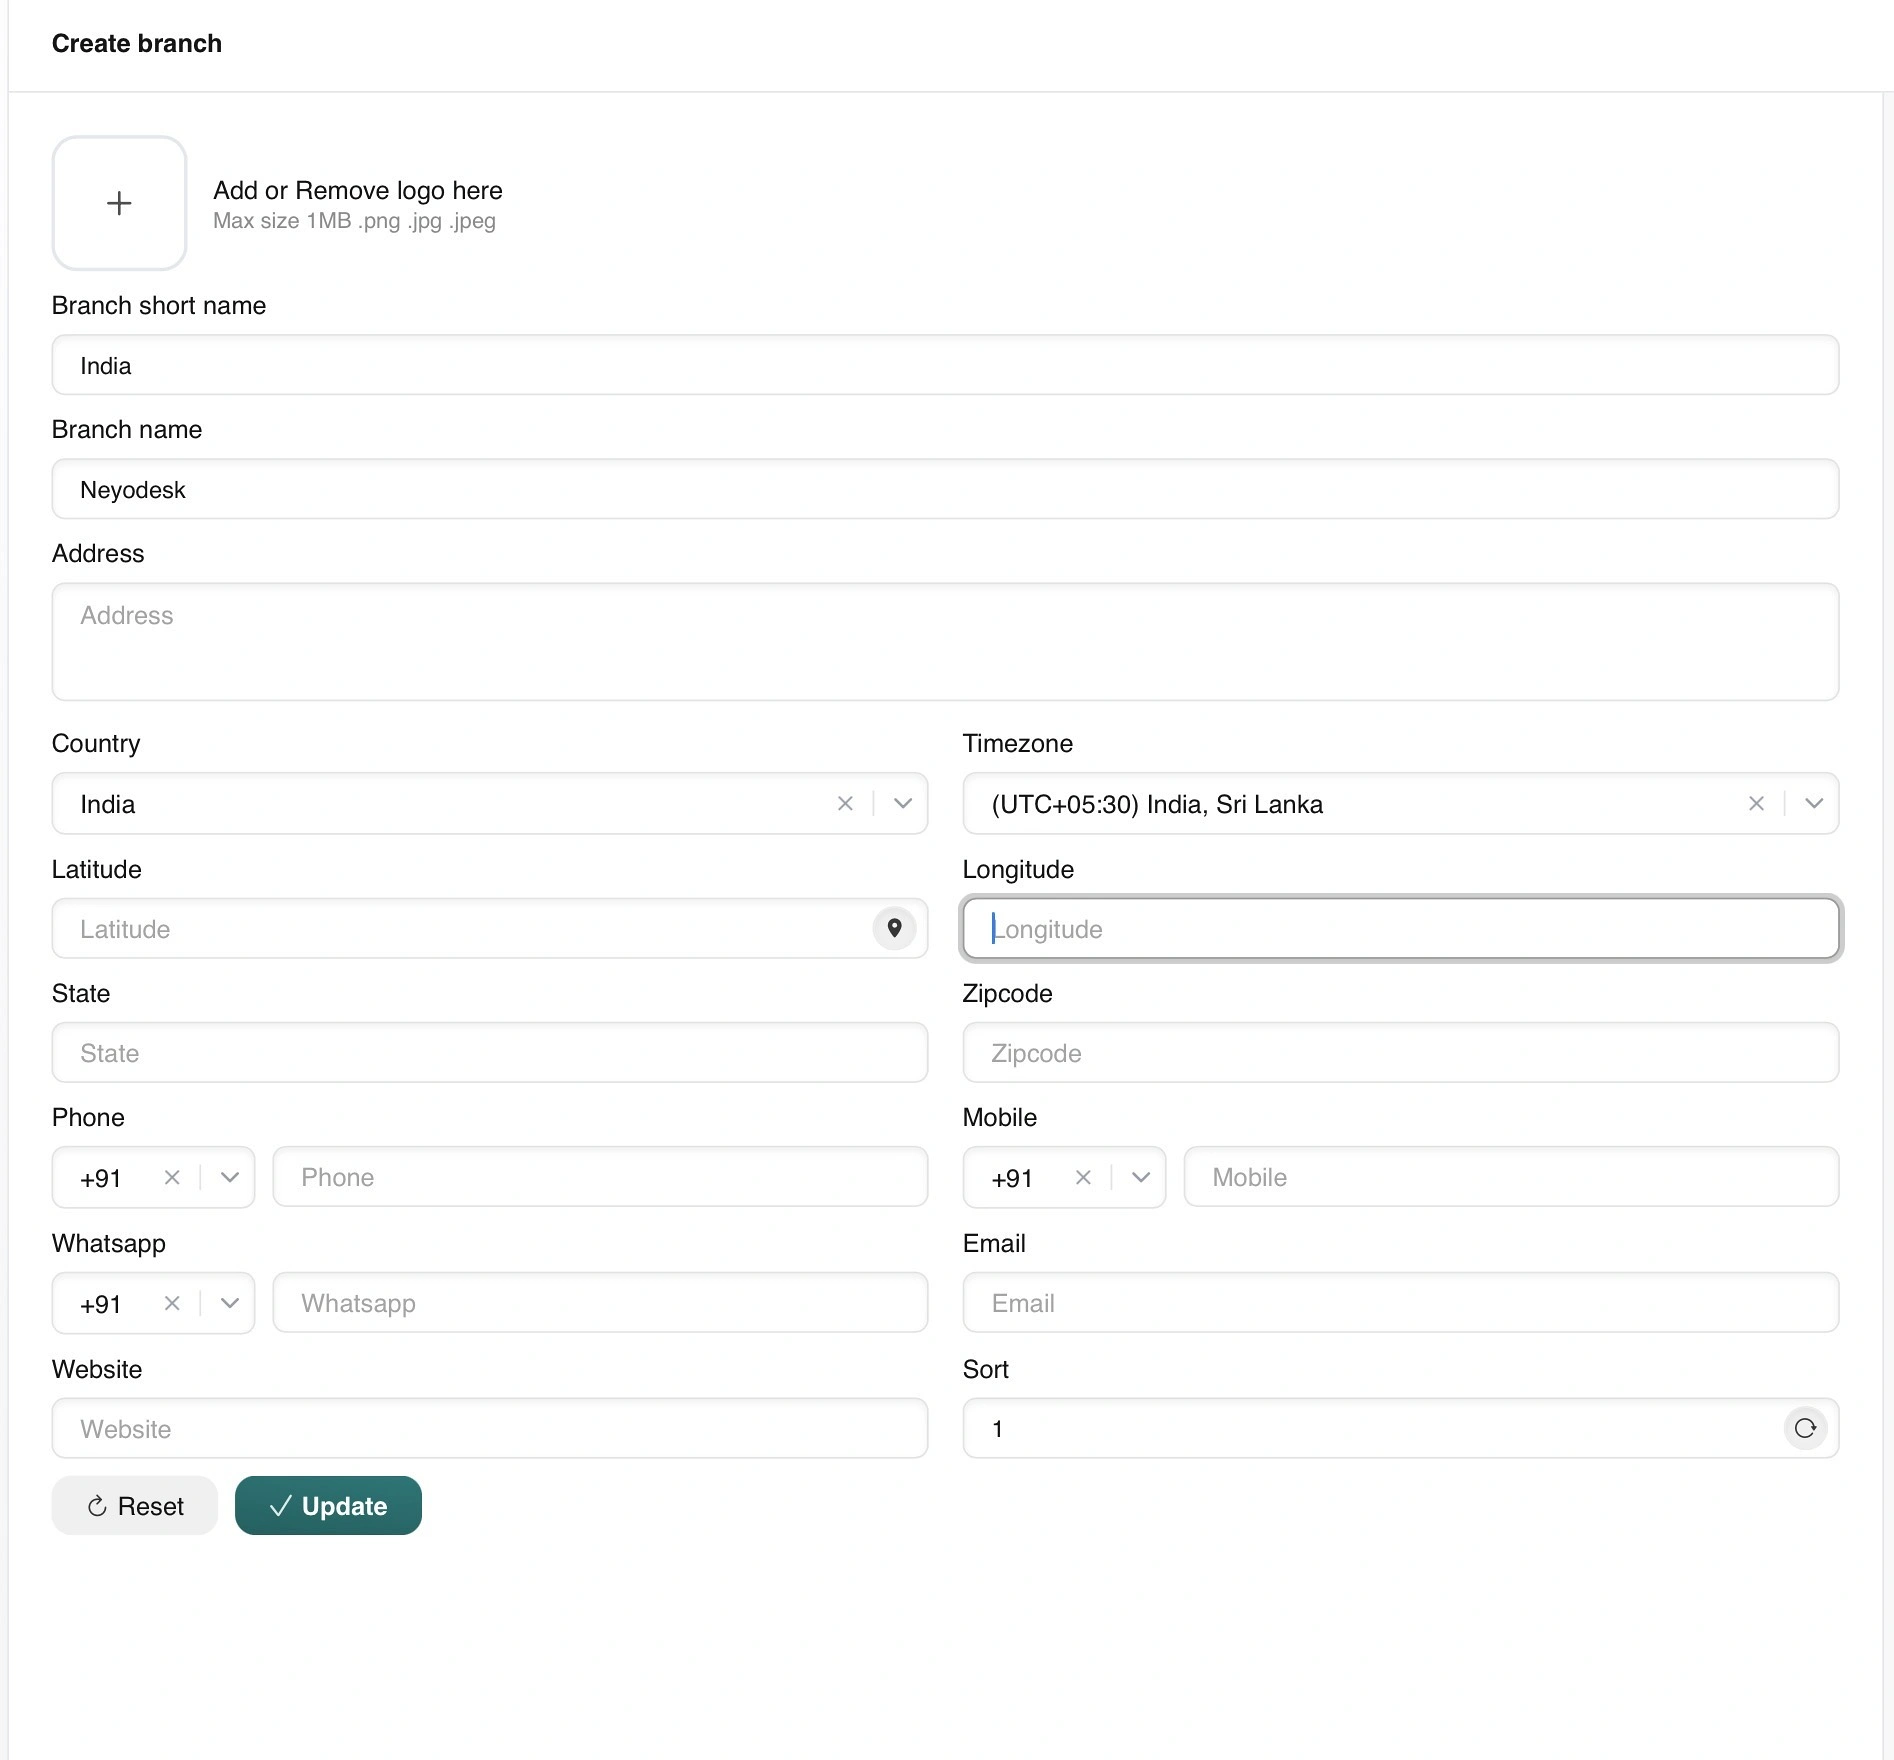
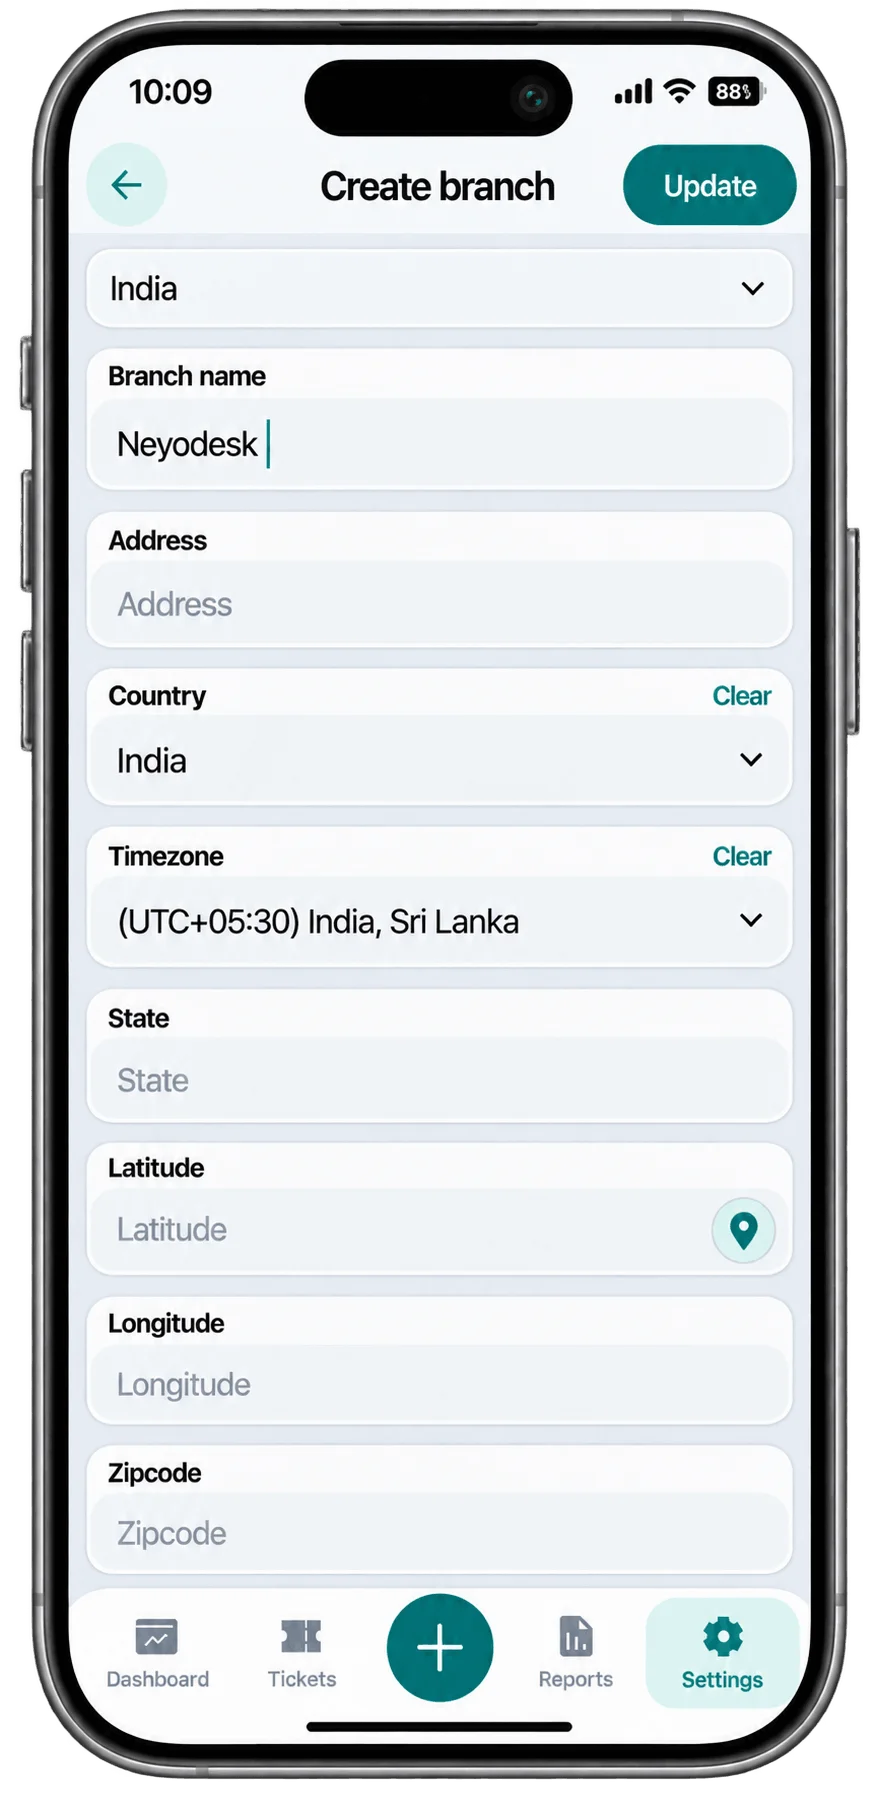
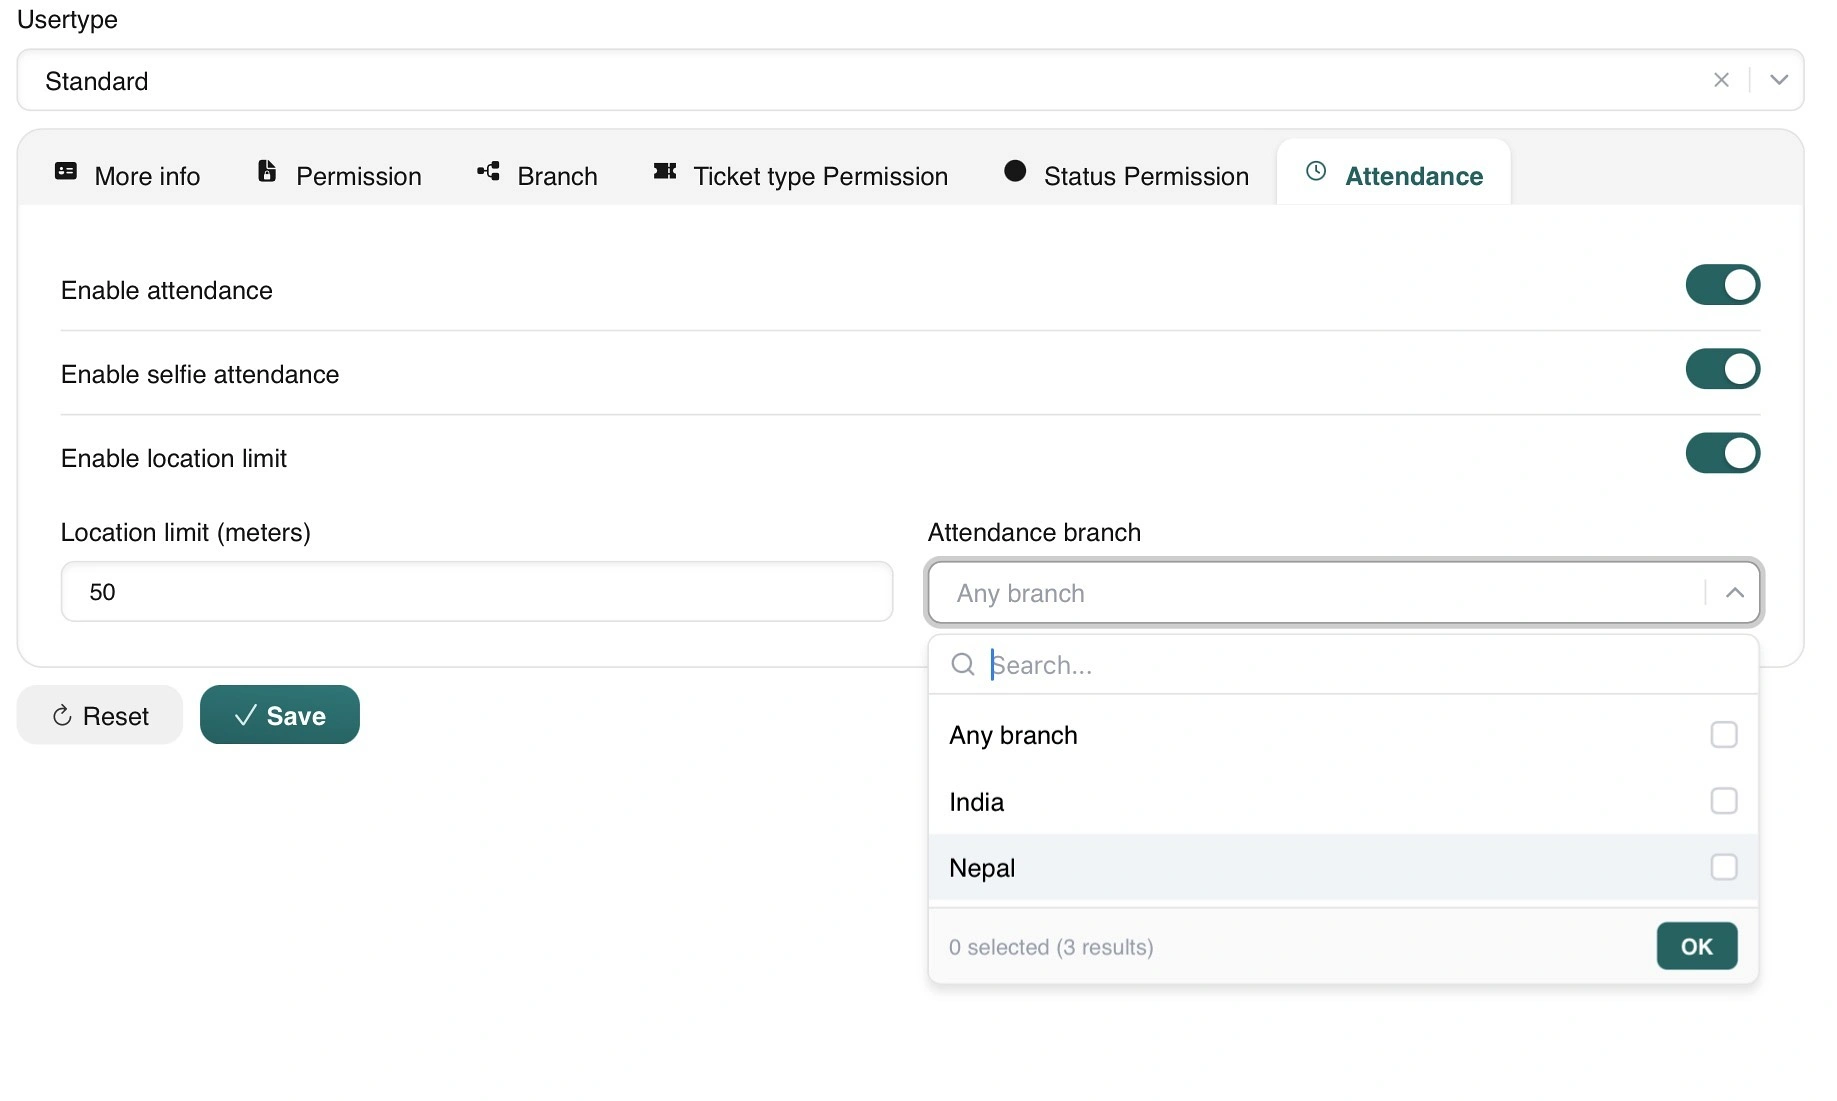
Go to Settings → Users, edit a user, and open the new Attendance tab. Tailor the verification strictness and branch radius according to your organization's needs.
Turns on attendance tracking for this specific user, activating the live attendance card directly on their mobile dashboard.
Captures a live photo every time the user checks in, checks out, or marks absent - eliminating proxy attendance and buddy punching.
Restricts check-in to a strict geographic perimeter around the designated branch coordinates.
No fixed cap. Set it to 10 meters for a tight, on-premises room, or open it up to 50m, 100m, or wider for large campus sites.
Assign the user to one specific branch (they can only check in there) or allow access across multiple or all branch locations.
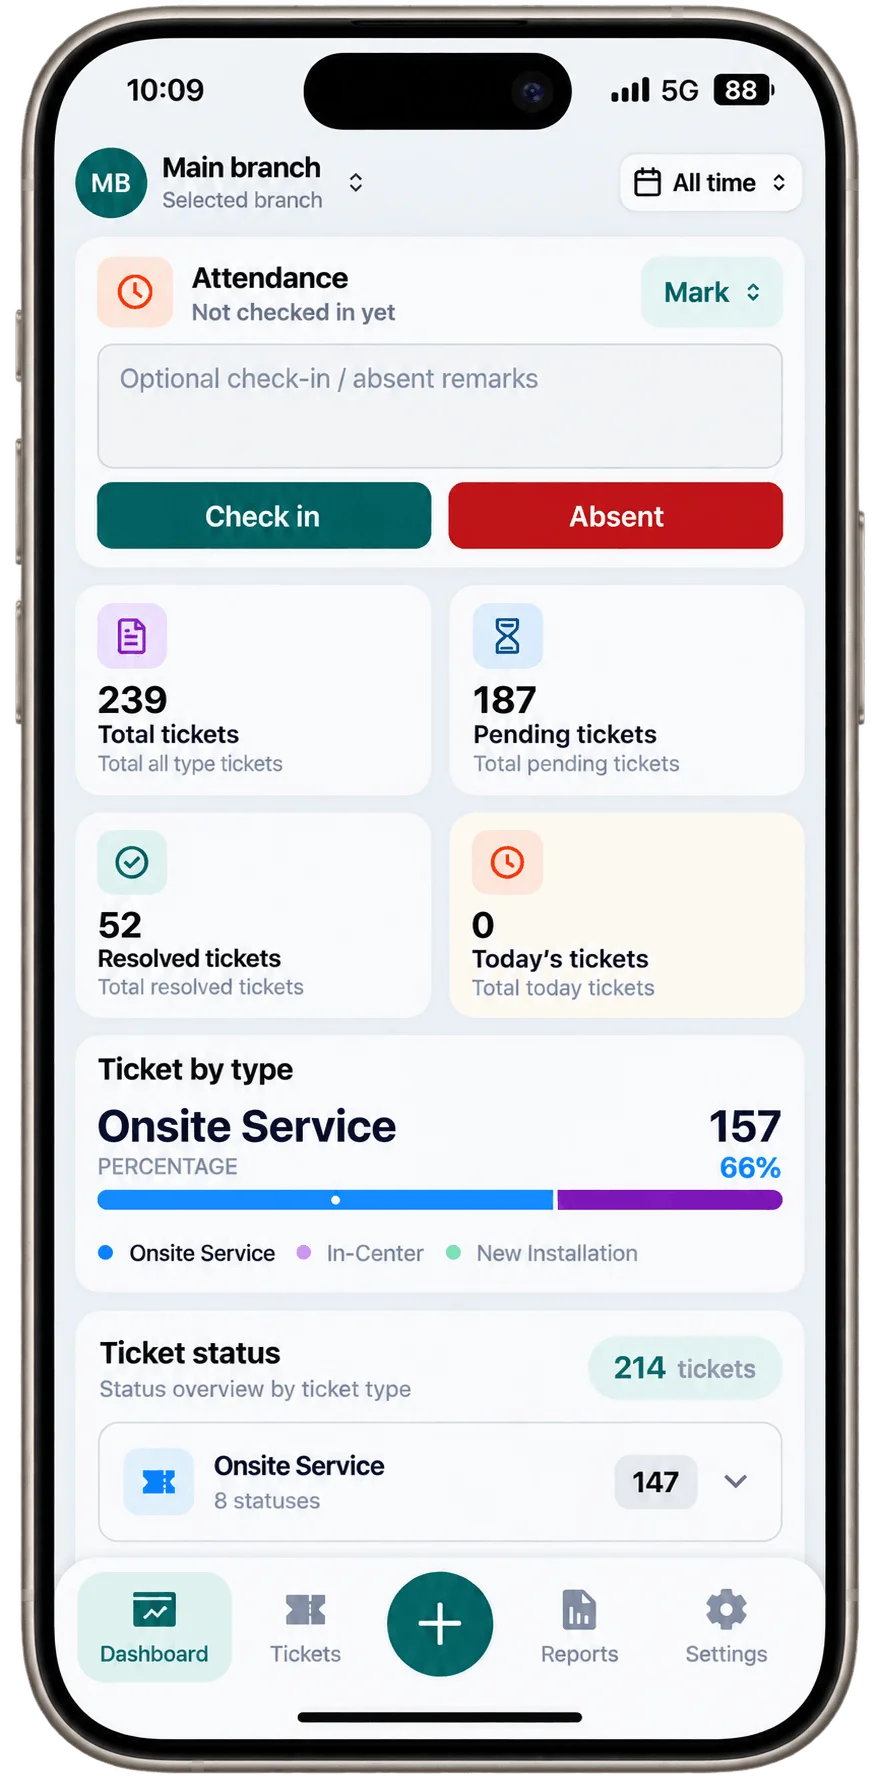
Once enabled, users see an Attendance card right on their dashboard, with a Mark dropdown. To check in, they tap Check in - the selfie camera pops up automatically if enabled, and location is captured in the background. They can also add an optional note, handy for explaining a late arrival.
Checkout works exactly the same way. Marking absence follows an identical flow, with a note field and the same photo capture - just tap Absent instead.
Head to Reports → Attendance to see every check-in and checkout with exact timing. Tap the location and it opens directly in Google Maps, with the selfie photo sitting right alongside it for full verification.
Every check-in, checkout, and absence is recorded with second-level precision down to the minute.
Tap the captured location to open directly in Maps and inspect the exact coordinates where staff clocked in.
The selfie photo sits right alongside the report record for instant, undeniable visual audit verification.
Review explanatory notes submitted by team members during check-in for late arrivals, field duties, or leaves.
If your staff ever encounters an alert during check-in, here is what the device prompts mean and how to resolve them right away:
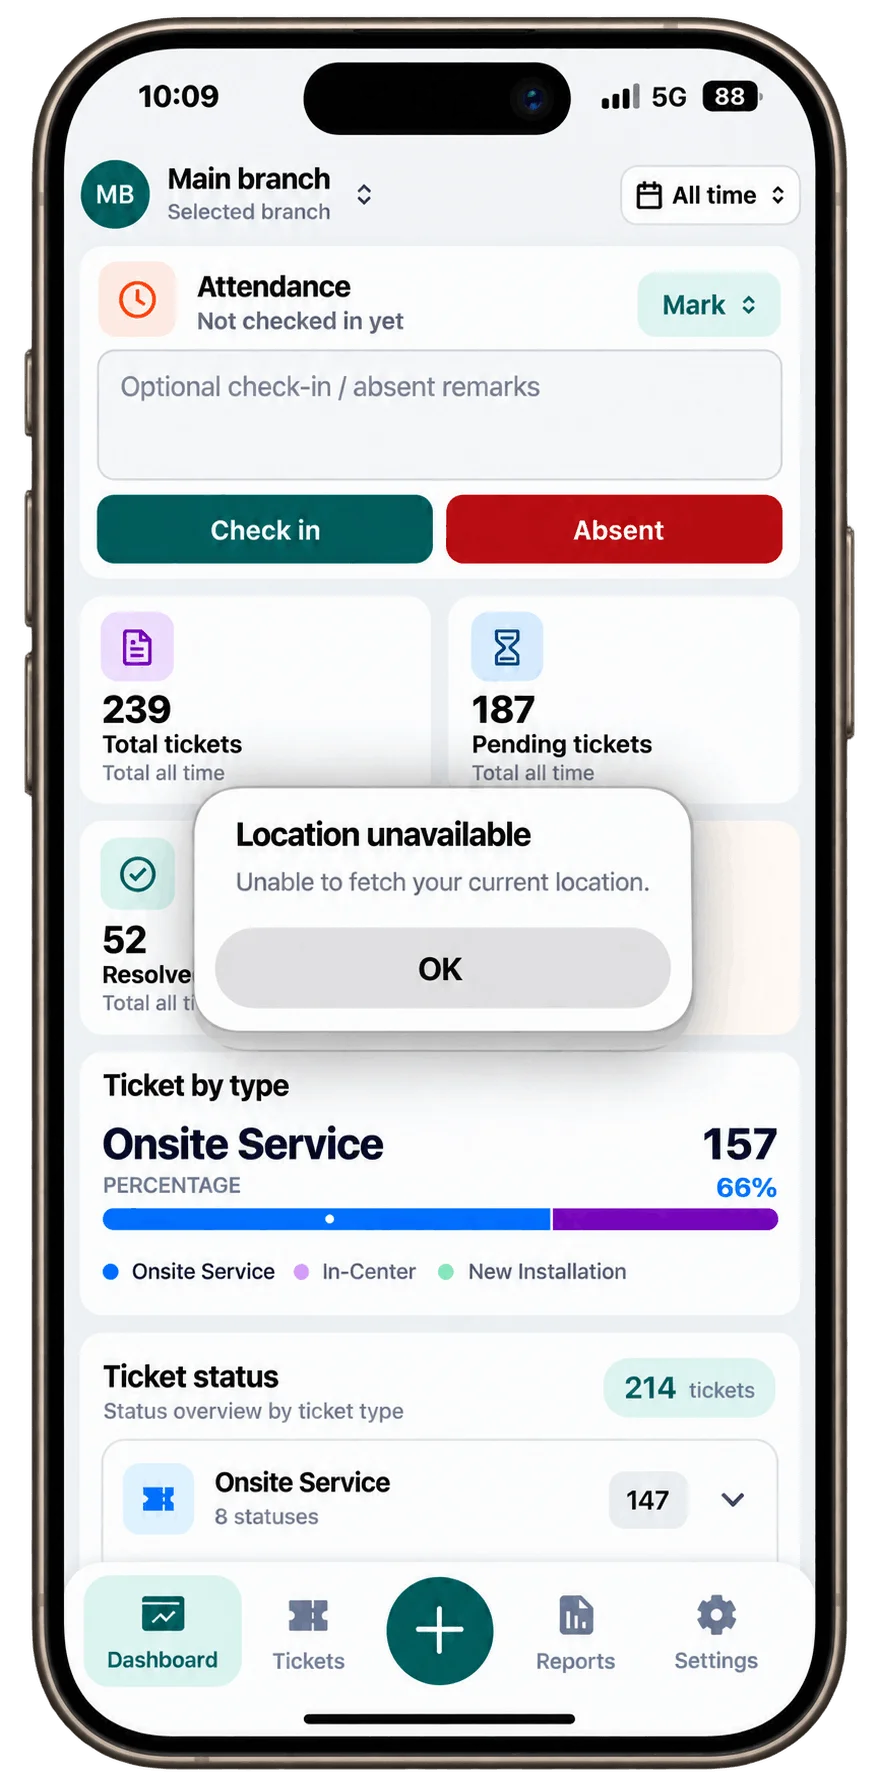
The smartphone couldn't fetch a clean GPS fix. Have the team member step near a window, step outside with a clear view of the sky, or ensure mobile location services are toggled on.
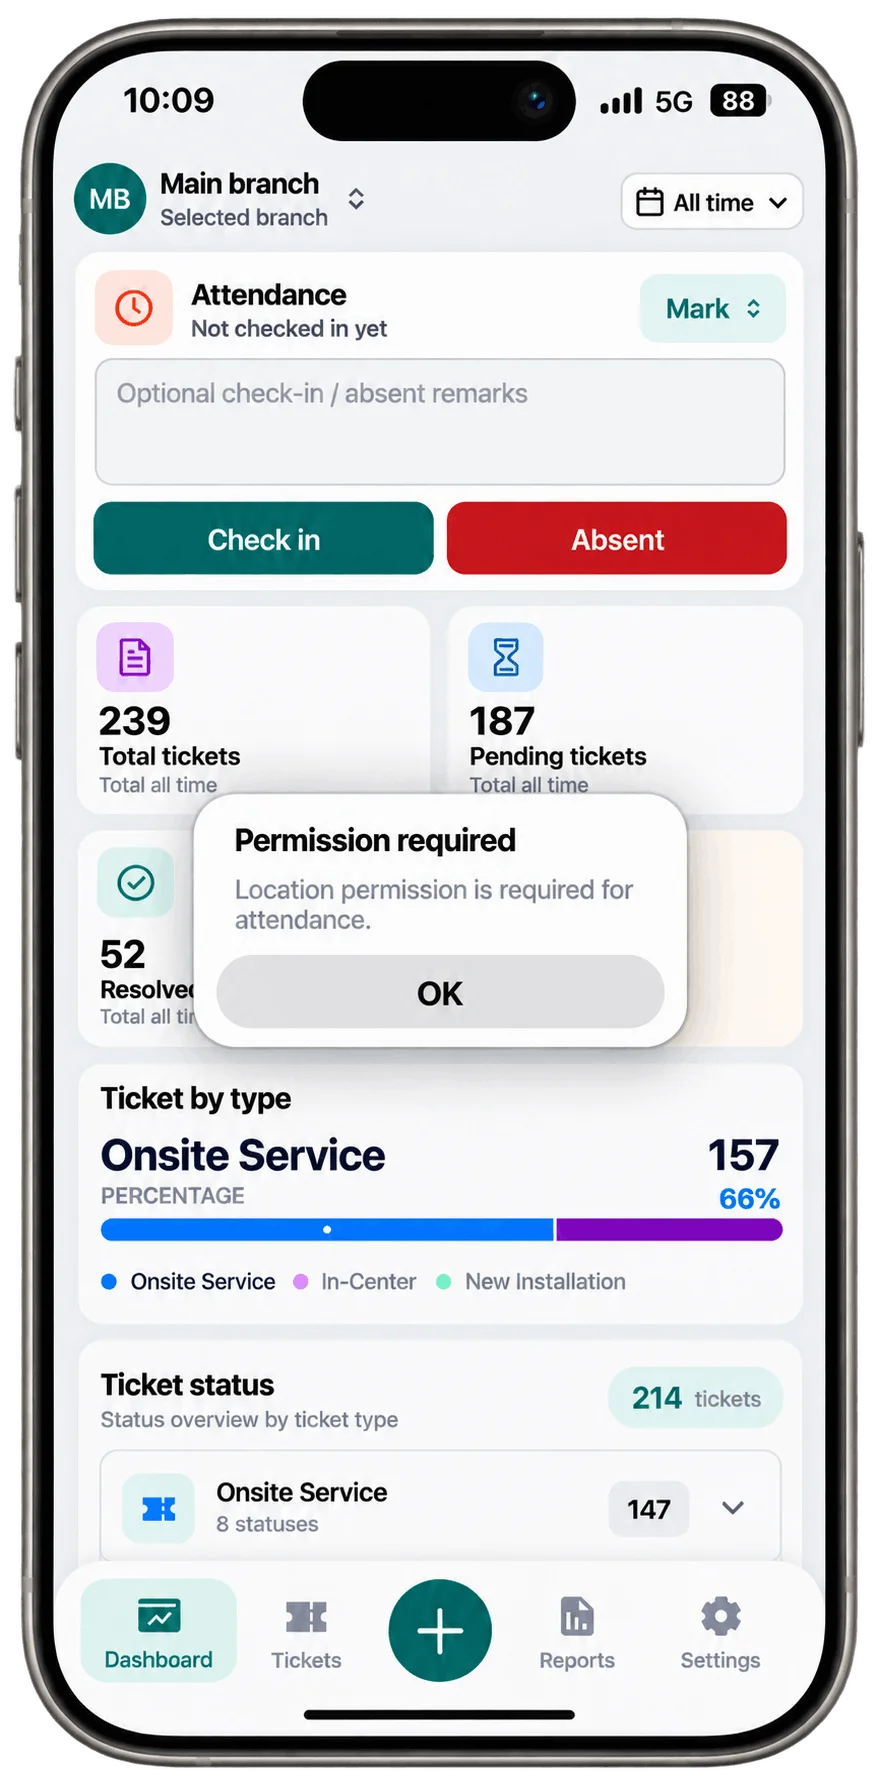
Location access hasn't been granted to NeyoDesk yet. Open the device's application settings (`Settings → Apps → NeyoDesk → Permissions`) and enable both Camera and Location access.
21 Days Free Trial / No Card Needed
Perfect for single service centers or growing service operations getting started.
Start Free TrialBest value for growing service teams with full multi-branch capabilities.
Start Free TrialUnlimited users, unlimited tickets, unlimited attendance - ₹499/month. Start with full access for 21 days.
Try NeyoDesk Free